Connect with us

Fitness

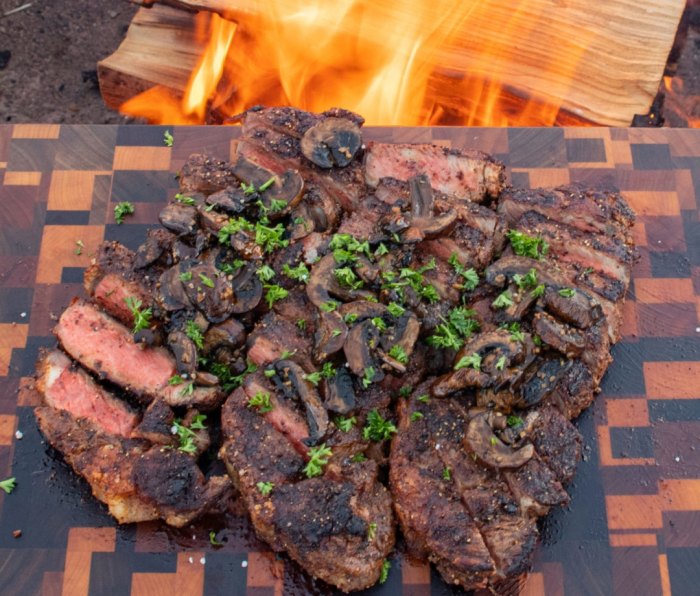
Campfire Cooking 101: How to Make Amazing Meals Over an Open Fire

Published

on

New York Strip Steaks cut up on a wooden cutting board campfire cooking


For Derek Wolf, cooking over an open flame is an art form. When he thinks about campfire cooking, his mind doesn’t go to roasting a hot dog on a stick or tossing some foil-wrapped taters into the coals. Instead, he dreams up dishes like spicy rotisserie beef ribs with grilled bacon-wrapped asparagus, coal-roasted lobster tails with cowboy broiled cheesy broccoli, and al pastor skewered tacos with charred and glazed pineapple. Think campground eats can’t be gourmet? Wolf’s recipes will change your mind.


Wolf is the mastermind behind the Over the Fire Cooking blog (as well as its Instagram account, which has attracted 1.8 million followers for its flame-kissed food porn) and author of the cookbook Food by Fire, so it’s fair to say he knows a thing or two about making a masterful campfire meal. We recently talked with him to get his tips and tricks for cooking an elevated outdoor feast. Read on for his advice (and a tasty recipe, too).

1. Build a Log Cabin-Style Fire

When building a fire, do you arrange your logs in a teepee or stack them into a log cabin? If you ask Wolf, he’d say both have their pros. The teepee is good for creating high heat at one centralized point (the top of the teepee), and it’s ideal for boiling water. For your meal, however, opt for the log cabin. This style of fire generates heat in a wide, even plane—better for heating up a skillet or grill.

To build one, place your fire starter in the fire pit, light it, and then add two logs in parallel on either side, says Wolf. Then add two more logs—perpendicular and on top of the first two logs—to form a square around your fire starter. Keep stacking in this alternating order until you reach your desired height.

“I typically do about four stories,” Wolf tells Men’s Journal.

As the fire burns, the layers of logs will break down, but you can stack more logs to keep it going. If done properly, the fire should last for hours.

2. Wait for Coals

Generally speaking, you don’t want to put your food on the fire the moment it’s lit. At first, the flame won’t produce consistent heat, and you’ll run the risk of burning your meal. Instead, get the fire going and give it time to burn down to coals, says Wolf.

“A good fire can take anywhere from 30 to 45 minutes to break down and get to where you’d like it temperature-wise for cooking,” he says.

While the fire grows, use that time to do meal prep. If you’re cooking meat, be sure to take it out of the fridge or cooler and let it warm to room temperature. This will help it cook evenly.

3. Consider the Type of Heat You Need

There are two ways to cook over fire: directly and indirectly. Direct-heat cooking means you’ll place your food right over the heat source: Using skewers, cooking on coals, or grilling over the flames with a grate. This method exposes your food to high-intensity heat, and it’s good for searing and foods that don’t need a long time to cook.

The indirect method places food near or around fire and uses radiant heat to cook it. This is common practice for barbecue. Indirect heat is great for preventing flare ups (grease and fat won’t drip into the flames), breaking down really fatty meats, or cooking delicate protein (i.e. chicken). It also creates a beautiful exterior crust.

4. Keep Your Fire Consistent

Keeping your fire’s temperature steady is key to cooking your food just right. But that’s easier said than done. One trick Wolf recommends is the “hand test.”

“A good hand test tells you the temperature based on the time you can hold your hand near the fire,” he says.

Here’s how to do it. Once your fire is going, hold your hand six to eight inches away from the flames. The amount of time you can hold your hand near the fire roughly tells you how hot it’s burning. If you can hold it there for up to three seconds or less, the blaze is generating high heat. Medium-high heat is around four to five seconds, medium is six to eight, medium-low is eight to 10, and low is 10 to 12. If you can hold your hand near the fire for longer than 12 seconds, it’s not hot enough for cooking.

5. Check Your Food’s Temperature

The last thing you want to do is undercook your chicken and risk food poisoning or overcook a choice steak. The best way to avoid those scenarios, says Wolf, is to use a meat thermometer. To use it, insert the thermometer’s tip at the deepest point on your cut of meat, making sure not to touch any bones. Chicken should be cooked to 165 degrees, pork and fish to 145 degrees, and ground meat should be over 160 degrees, for example.

6. Be Aware of Carry-Over Cooking

Many people make the mistake of cooking their meat all the way until it hits the ideal internal temperature. That’s a problem because the food continues to cook even after it’s off the fire, a process known as carryover cooking.

“This results in it being overcooked,” Wolf explains.

Instead, pull the meat off the heat a bit before it reaches the desired internal temperature. When cooking a steak, for example, take the meat off the fire when it hits 120 degrees and let it rest—it’ll reach medium-rare (125 degrees) on its own. It’s a good idea to let meat rest for about half the time it was cooked, Wolf says.

7. Tools of the Trade

One of the best parts of campfire cooking is its simplicity—no ovens or fancy stoves, just wood, flames, and food. That said, Wolf does recommend a few gear items to make the job a little easier.

He likes the lightweight Breeo Outpost grill for cooking in the backcountry, and the X Series fire pit is a great option for the backyard. He prefers a natural fire starter and matches to build his fires—you want your food to taste smoky, not like lighter fluid, he says—and welding gloves can be helpful for maneuvering logs without getting burned. Finally, you’ll need a meat thermometer as well as a sharp knife and a cutting board for prepping your food.

Wondering what to cook? Wolf recommends the recipe below as a good place to start. Of course, you can also check out Over the Fire Cooking for even more fire-ready meal inspo.


New York Strip Steaks with Bourbon Mushrooms
Courtesy Image

New York Strip Steaks with Bourbon Mushrooms

Equipment:

  • Cast-iron skillet
  • Tongs
  • Knife
  • Cutting board

Ingredients for the Steaks:

  • 3-4 New York strip steaks
  • 1.5 tbsp sea salt
  • 1 tbsp black pepper
  • 2 tsp garlic powder
  • 2 tsp chipotle powder
  • 1 tsp canola oil
  • Chopped parsley for garnish

Ingredients for the Bourbon Mushrooms:

  • 1 cup shiitake mushrooms
  • 2 oz bourbon
  • 2 tbsp beef broth
  • 1 tbsp minced garlic
  • 1 tbsp brown sugar
  • 2 tsp Worcestershire sauce

How to Make It:

  1. Rub steaks with oil. In a bowl, mix together salt, pepper, garlic, and chipotle powder. Season steaks thoroughly and set aside for 30-40 minutes in the fridge or cooler to dry brine. About 10 minutes before cooking, pull the steaks out and let them come to room temperature.
  2. Build a medium-high heat fire for direct cooking. Add some canola oil to the cast-iron skillet and place skillet above the fire 2 minutes before cooking.
  3. Add steaks to skillet, cap side down, and cook for 1 minute to render the fat. Then, place the steaks flat to cook for about 2-3 minutes per side, until they reach a 120-degree internal temperature. Then pull them off skillet and let rest for 10 minutes.
  4. Add mushrooms to skillet and cook out the water (about 4 minutes). Once they are golden brown, deglaze the skillet with bourbon and let simmer for 1 minute. Next, add the rest of the ingredients for the bourbon mushrooms and let simmer for 3-4 minutes, or until reduced. Once done, pull the mushrooms off the heat and set aside.
  5. Slice steaks, top with the mushrooms, and garnish with chopped parsley.


For access to exclusive gear videos, celebrity interviews, and more, subscribe on YouTube!


Source link

Fitness

10 Best Porters to Drink Right Now

Published

on

A bottle of Deschutes Black Butte Porter


Source link

Continue Reading

Fitness

Best Time-Under-Tension Workout for Total-Body Strength

Published

on

Barbell Back Squat


The key to 360-degree muscle: 90-degree eccentric isometrics. It might seem like we’re throwing a lot of geometry at you, but the concept behind time under tension (TUT) is simple, says Joel Seedman, PhD, owner of Advanced Human Performance: “Perform the lowering phase of a movement in a slow, controlled fashion, usually 3 to 5 seconds; pause in the stretched position, typically around 90 degrees; then perform the lifting phase in a powerful yet controlled fashion.” Believe us, a time-under-tension workout can humble even seasoned lifters…Eccentric isometrics are like the pressure cooker of training.

“Rather than mindlessly performing slow-tempo reps, you’re using the increased time under tension as a means to fine-tune your body mechanics and alignment, which requires more mental engagement and focus,” Seedman adds.

If you want to forge functional muscle mass and strength while simultaneously bulletproofing the joints and connective tissue, give this 10-move, full-body eccentric isometrics workout a go.

Directions

Perform the following moves as 90-degree eccentric isometrics following the above protocol. Use heavy weight, but not at the detriment of proper form. Rest 60 to 90 seconds between sets and 2 minutes between circuits. Perform once every 2 to 4 days for optimal results.

Best Time-Under-Tension Workout for Total-Body Strength

Circuit 1

Marius Bugge

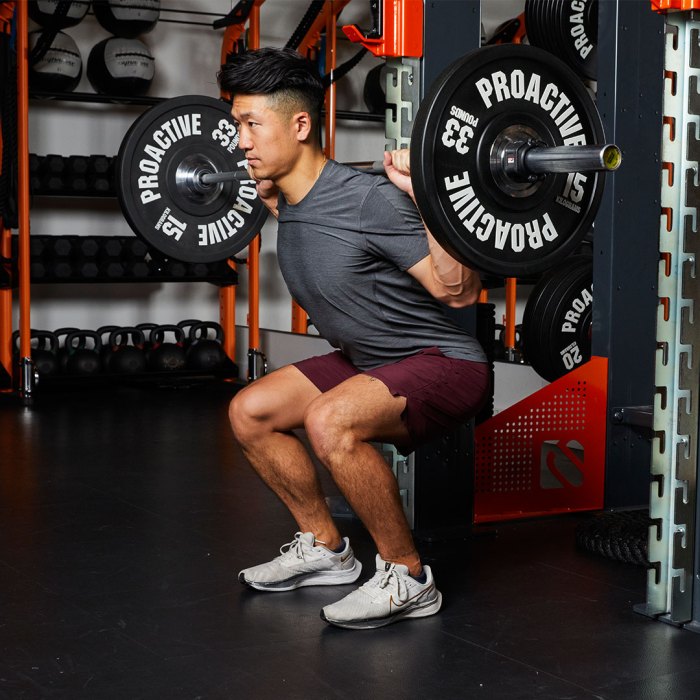
A. Barbell Back Squat

Set a squat rack up with heavy weight, then grasp bar and step under it. Squeeze shoulder blades together, then stand to unrack bar and step back with feet shoulder-width apart. Inhale, hinge at hips and slowly bend knees to 90 degrees. Pause, keeping natural arch in low back, then extend through hips to powerfully stand. 3 x 4-6 reps

Athletic man wearing gray T-shirt and maroon shorts renegade row
Marius Bugge

B. Renegade Row

Start in the top position of a pushup with hands shoulder-width apart on moderate-to-heavy dumbbells (shown). Explosively drive right elbow back to row dumbbell toward ribs while balancing on opposite hand and feet. Pause, then slowly lower weight, stopping a few inches above floor. Switch sides after all reps are done. 3 x 5 reps each side

Circuit 2

Athletic man wearing gray T-shirt and maroon shorts doing renegade row Dumbbell Bentover Row in gym
Marius Bugge

A. Dumbbell Bentover Row

Stand with feet hip-width apart, holding two moderate-to-heavy dumbbells in front of thighs, palms facing you. Push hips back and hinge torso forward so it’s nearly parallel to floor, soft bend in knees. Dumbbells should be near shins. Drive elbows back to row weights toward ribs. Pause, then slowly lower down for 3 to 5 seconds. 3 x 4-5 reps

Athletic man wearing gray T-shirt and maroon shorts doing Incline Dumbbell Chest Press with Legs Raised 
Marius Bugge

B. Incline Dumbbell Chest Press with Legs Raised 

Set an adjustable bench to a 30- to 45-degree angle and lie back with dumbbells in either hand. Engage core and lift legs off floor, flexing feet. Press weights overhead, palms in. Slowly lower to 90 degrees, staying tight and compact. Pause, then drive weights up directly over chest. 3 x 4-5 reps

Circuit 3

Athletic man wearing gray T-shirt and maroon shorts doing Dumbbell Bulgarian Squat
Marius Bugge

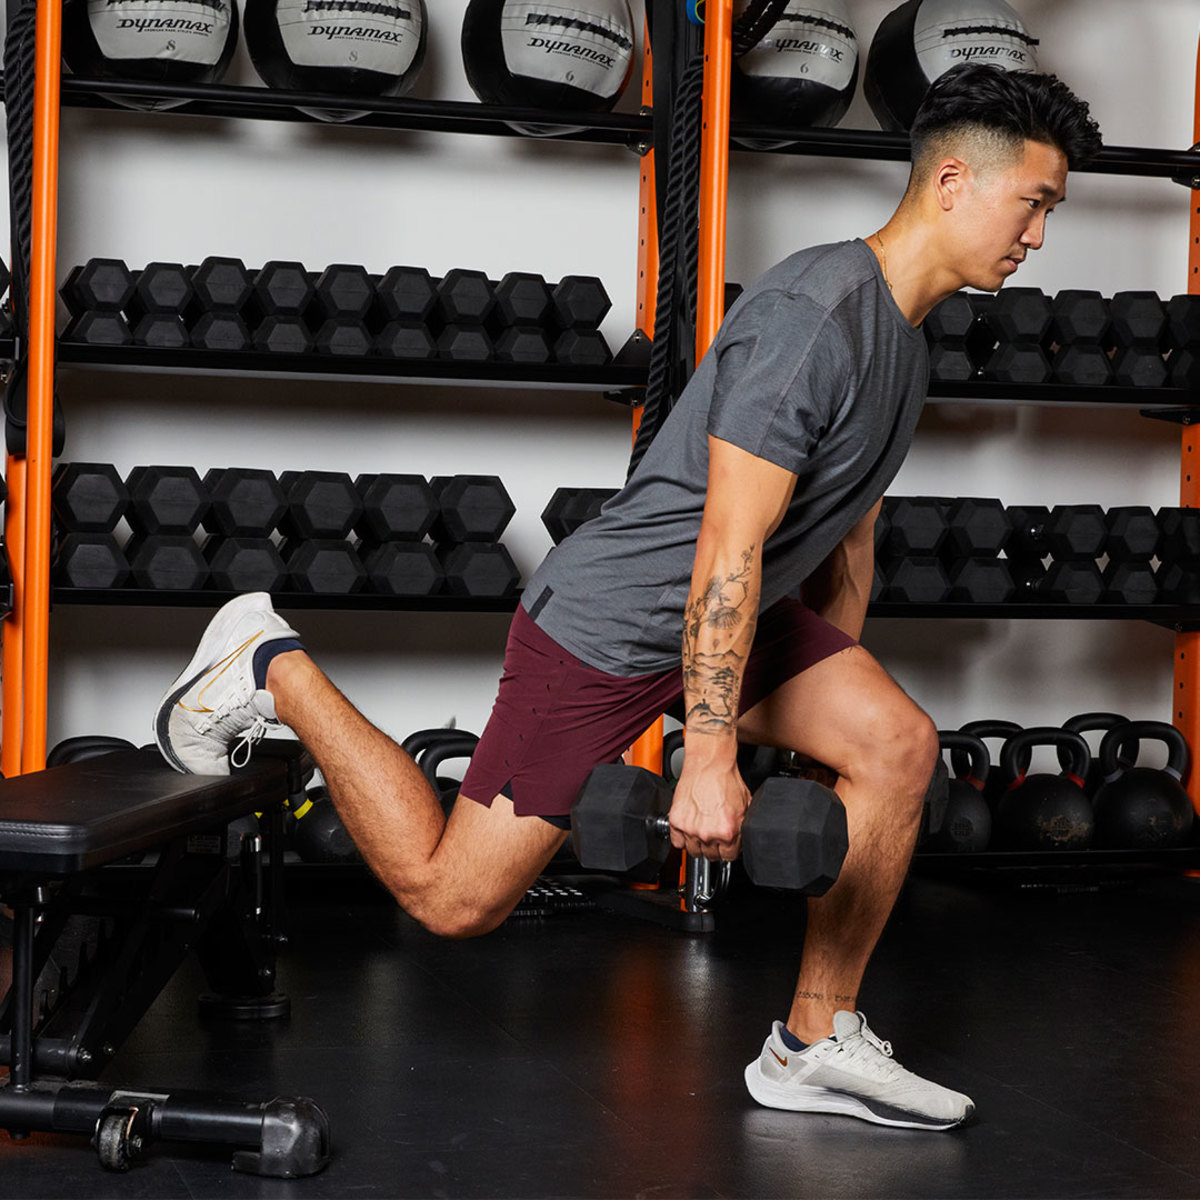
A. Dumbbell Bulgarian Squat

Stand lunge-length in front of a flat bench, holding heavy dumbbells in each hand by your sides, palms facing in. Rest the ball on top (shoe’s laces) of your right foot behind you on the bench. Slowly lower your body until your front thigh is parallel to the floor. Pause, then drive through your heel to stand. Switch sides after all reps are complete. 2 x 3-4 reps each side

Athletic man wearing gray T-shirt and maroon shorts doing Single-leg Romanian Deadlift
Marius Bugge

B. Single-leg Romanian Deadlift

Stand with feet hip-width apart holding dumbbells or kettlebells. Drive right leg up, foot flexed, knee aligned with hip, making a 90-degree angle. Hinge at hips as you slowly lever your torso toward floor, lowering weights and driving right leg back for counterbalance. Hold, then squeeze glutes to reverse. 2 x 3-4 reps each side

Circuit 4

Athletic man wearing gray T-shirt and maroon shorts doing pullup
Marius Bugge

A. Pullup

Hang from a pullup bar using an overhand grip with legs extended and feet flexed. Engage lats and draw shoulders down your back, then pull yourself up until chin is higher than hands. Pause at the top, then slowly lower. Pause at bottom, then reset before your next rep. 2-3 x 4-5 reps

Athletic man wearing gray T-shirt and maroon shorts doing Kneeling Overhead Barbell Press
Marius Bugge

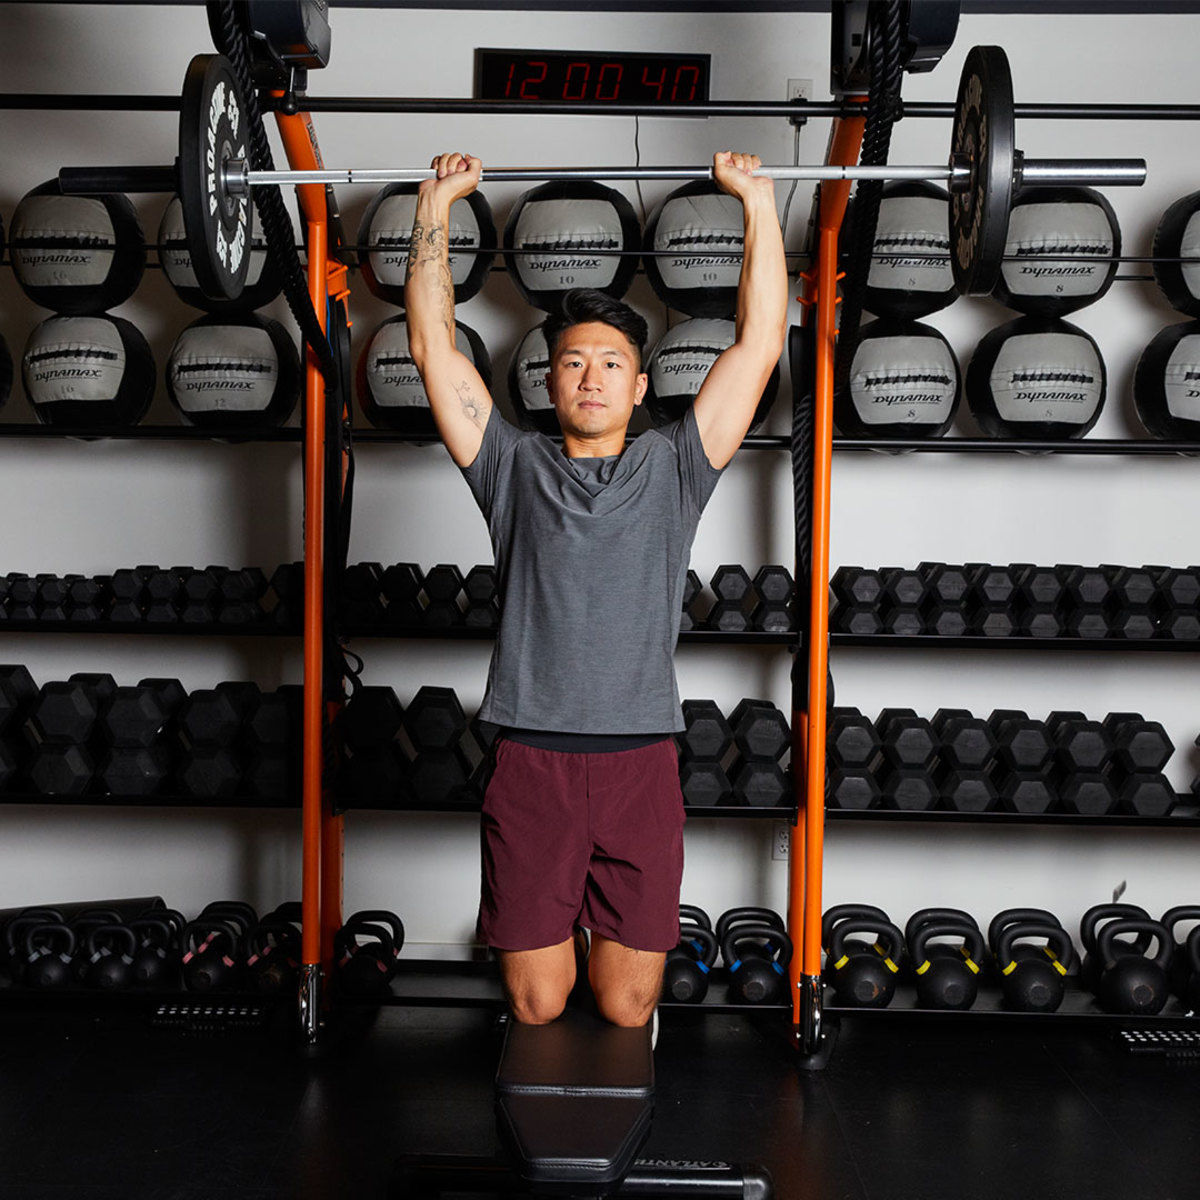
B. Kneeling Overhead Barbell Press

Hold a bar with moderate-to-heavy load at shoulder level with forearms perpendicular to floor. Kneel at end of bench with feet flexed to grip edge for support. Inhale, engage your core and glutes, then press the bar overhead, pushing your head forward so it passes your face, exhaling at the top.
Slowly lower until elbows are at 90 degrees, then hold to maintain tension. Begin your next rep from here. 2-3 x 4-5 reps

Circuit 5

A. Dumbbell Pushup

Place hands on dumbbells (this provides greater range of motion) at shoulder width and feet wider than shoulder width with just toes touching the ground. Keep head neutral and hips high to increase tension on core, chest and tris and reduce stress on spine. Slowly lower to the floor. Stop
once elbows hit 90 degrees, pause, then push up to start. 1-2 x 6-8 reps

B. Biceps Curl

Stand with feet hip-width apart with moderate-to-heavy dumbbells in each hand hanging by sides. Engage biceps to curl the weights up, keeping upper arms still. Pause at the top, then lower slowly. Don’t let arms drop all the way down to keep greater time under tension on biceps. 1-2 x 6-8 reps


For access to exclusive gear videos, celebrity interviews, and more, subscribe on YouTube!


Source link

Continue Reading

Fitness

The Best Jump Ropes for a Killer Cardio Workout

Published

on

The Best Jump Ropes for a Killer Cardio Workout


Source link

Continue Reading

Copyright © 2021 Vitamin Patches Online.